W12:Labs:lab00
From 56wiki
CS56—Advanced Applications Programming—W12
| W12:Exams | W12:Homework | W12:Labs | W12:Calendar and Lecture Notes | W12:Syllabus | W12:Choice |
|---|
| lab00 | lab01 | lab02 | lab03 | lab04 | lab05 | lab06 | lab07 | lab08 |
lab00: Orientation (javac, java, editing, turning in)
| assigned | due |
|---|---|
| Thu 01.12 | Fri 01.21, 5pm |
Tip
If you find typos or problems with the lab instructions, log in to the wiki, and then click the "discussion" link near the top of this page. You can enter your comments on that page.
Typo corrections can earn you choice points--but only if you do two things:
- Sign your post on the discussion page by entering four tilde marks in a row at the end of your post, like this: ~~~~
- On your User page on the wiki—the one you edited in W12:Homework:H00—add a section like this:
= Wiki Edits for Choice Points =
* Typo report for [[W12:Labs:lab00]]
If you have further questions about how to report typos, ask your TA or instructor.
Step 0: Getting oriented
Chances are you are already familiar with all of the following because you already took CS courses that used this stuff (i.e. CS8, CS16, CS24, CS32).
If not--if for example, you are a transfer student and this is your first CS course using the Cooper Lab, please let your TA know and he/she will help you find resources to come up to speed on these things. Or, your TA can assign you a pair partner that knows this stuff and doesn't mind helping you come up to speed.
- knowing your College of Engineering/CSIL computer account username/password--and having an active working account.
- knowing how to login to the systems in Cooper and CSIL, and bring up both a web browser, and a terminal window.
- knowing that "CSIL" is both a server you can log into, as well as a physical room full of computers--and knowing where to find that physical room, and what hours it is open.
- knowing how to use the "turnin" command to submit assignments.
- knowing how to use a basic text editor such as emacs or vim to edit files on the Linux systems in Cooper/CSIL.
- knowing basic Unix/Linux commands to create directories, change directory, manipulate files, etc., e.g. mkdir, cd, pwd, mv, rm, ls.
- how pair programing works
The rest of these instruction will assume you know all of the above. If not, then let your TA know, and we'll point you to resources where you can come up to speed.
If you need help with one or more of the items in the list above: here is one suggestion--the lab00 from Conrad's CS16 course. Just ignore the stuff about C programming, and pay attention to everything else:
http://www.cs.ucsb.edu/~pconrad/cs16/10S/labs/lab00
For pair programming, consult this videos:
As a separate item, you should also know how to connect to CSIL from your own computer (PC/Mac/Linux)
- Windows: Putty, optionally with XMing. See for example: CSIL Access:Windows.
- Mac/Linux:
ssh -Y username@csil.cs.ucsb.edu, CSIL Access:Mac and Linux.
But, you don't need that for today's lab---so let's continue.
The rest of the lab: Step-by-Step
Step 1: Hello, World in Java
Make a directory ~/cs56 in your CSIL account.
Under that directory, create lab00.
In lab00, use a text editor (e.g. emacs or vi) to create the MyFirstApp.java program described on p. 8 and 9 of the Head First Java, 2nd Edition textbook, which you can view here:
- page 8 (On Campus Off Campus)
- page 9 (On Campus Off Campus)
Use the command javac MyFirstApp.java to compile the program.
Use the command ls to see that the file MyFirstApp.class was created.
Use the command java MyFirstApp to run the code.
Tip
- To run, we use
java MyFirstApp - NOT
java MyFirstApp.java - NOT
java MyFirstApp.class
Great, you can now program in Java.
Potential Exam Questions
Assuming class MyFirstApp contains a main() method, which of these is the correct command to compile?
- (a)
java MyFirstApp - (b)
java MyFirstApp.java - (c)
java MyFirstApp.class - (d)
javac MyFirstApp.java - (e)
javac MyFirstApp.class
Assuming the class mentioned in the previous question was successfully compiled, which of these is the correct command to run the class?
- (a)
java MyFirstApp - (b)
java MyFirstApp.java - (c)
java MyFirstApp.class - (d)
javac MyFirstApp.java - (e)
javac MyFirstApp.class
Step 2: Add a Javadoc style comment to the top of the file
At the top of the file:
- Add this comment, substituting your own name where it says INSERT NAME HERE.
- Also, for the item that says version, change the date, lab number and quarter to the actual date that you are doing this lab.
/** MyFirstApp is a sample program from p. 8-9 of Head First Java, 2nd edition.
 @author Kathy Sierra and Bert Bates
 @author INSERT NAME HERE
 @version 03/30/2011 for lab00, cs56, S11
*/
The format of Javadoc comments is special, so be careful to format everything exactly as shown, with two stars after the open slash, and all of the other punctuation and line breaks exactly as you see them above.
The reason for these specially formatted comments is that they allow us to automatically build documentation for our Java code in the form of a web site with hyperlinks. Working with Javadoc (and documentation generation, generally) is an important real-world job skill that we'll learn in this course.
After you add the javadoc comment, compile it and run it again to make sure it still compiles and runs, i.e:
javac MyFirstApp.java
java MyFirstApp
Then, see if you can create javadoc for this program on your CSIL website, with the following command:
javadoc -d ~/public_html/cs56/lab00/javadoc *.java
This command says: run the javadoc utility,
- create the javadoc in the directory
~/public_html/cs56/lab00/javadoc - use all of the files ending in .java in the current directory as input (that's the *.java part)
As you probably know by now, the directory ~/public_html/cs56/lab00/javadoc corresponds to the following web page (substitute your CSIL username in place of the word username below.
- http://www.cs.ucsb.edu/~username/cs56/lab00/javadoc
Check that link, and see if you find Javadoc for your class there. You should find a website that looks something like this:
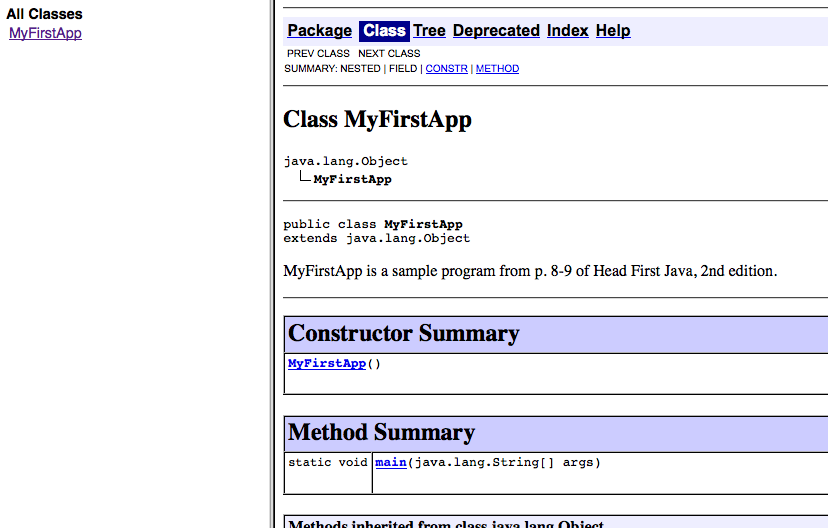
One thing that's missing is the author and the version. To get those to appear, you can include -author and -version on the command line, like this:
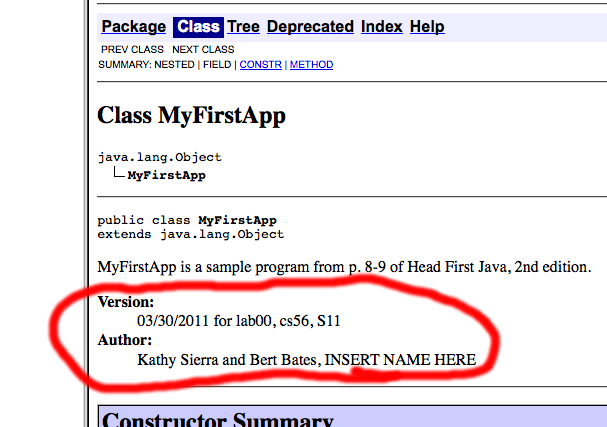
javadoc -author -version -d ~/public_html/cs56/lab00/javadoc *.java
That should cause the author and version to appear. Be sure that your name and the correct date appears now, and not the name and date that you see in this picture:
Step 3: Look at some Java code
Open a web browser, navigate to the links below in two windows, or two tabs. These links give you access to two Java classes that are the starting point for this week's lab:
- http://www.cs.ucsb.edu/~pconrad/cs56/12W/labs/lab00/UCSBCourse.java
- http://www.cs.ucsb.edu/~pconrad/cs56/12W/labs/lab00/UCSBCourseTester.java
Take a look at these two classes. In a later step, you'll be asked to make some modifications to each of them, so it is worth getting to know them a bit.
The first class, UCSBCourse.java models an object which corresponds to a UCSB Course such as CS56, MATH3A, or PSTAT120A. (We'll use the full registrar name for CS56 here, i.e. CMPSC56).
You should have already taken CMPSC24 or an equivalent course where you learned about classes in C++. As you look at the code for this UCSBCourse class, notice some things that you can recognize as similar, while some other things are different:
- We still have
publicandprivate, but instead of having apublic:section and aprivate:section, the keyword public or private occurs in front of each method or attribute. - We can see that the class has three attributes (i.e. data members), all of which are private. Making data members private is good practice, and something you should have already learned about in your study of C++.
- We see a constructor, which just as in C++, initializes the data members of the class.
- We see that
String(capitalized) is a predefined data type—as we'll see later, it is actually a predefined class. - We see that there are four getters, though there are only three attributes; the last getter returns the concatenation of the two strings representing the department abbrivation (e.g. CMPSC, MATH or PSTAT) and the course number. Two of the getters have correct code, while the other two have stubs (incorrect values used as placeholders.) Notice what operator is used for string concatenation.
If you haven't see the idea of a "stub" before, the idea is simple.
- Before writing the code for a method, you first write "test code"—code that calls the method with hard-coded values for the parameters, and then checks whether the method did what it was supposed to do.
- But, you can't actually compile or run that test unless you've written the method, so you write a "stub" method that intentionally returns a wrong answer.
- That also allows you to "test the test", i.e. to make sure that your test code correctly detects a failure when your code does the wrong thing.
Tip
What was just described is a concept that is at the very heart of "test-driven development", which is a major theme in this course. So, you can be sure that you'll be asked about it on exams, and you'll need the idea for lots of labs and homework assignments. So take a moment now to make sure you that you understand the basic idea here. Discuss it with your pair partner if that helps.
The second class, UCSBCourseTester consists only of a main method that we can run to test the class. Eventually we'll switch to using a package called JUnit that supports test-driven development in Java. For now, we're doing something a bit more basic.
UCSBCourseTester just has a simple main method that uses the capabilities of the BankAccount class and then prints the result, along with what we expect the result to be. In Java, every main() method must live inside a class—there is no such thing as a separate standalone main() function as in C/C++.
Also notice the Javadoc comments. They can be used to produce documentation for the class in the form of a website. Here's a link to the Javadoc for this class, which explains the methods it provides:
When you've spent a few moments looking over the code and the Javadoc, continue on with the next steps.
Step 4: Copy the code into your directory
Save the two Java programs you brought up in the web browser, inside your ~/cs56/lab00 directory.
Save them with their original names: either UCSBCourse.java, or UCSBCourseTester.java.
Three ways to accomplish this:
- You can do a "save as" from your web browser
- You can use the Unix cp command and copy directly from:
/cs/faculty/pconrad/public_html/cs56/12W/labs/lab00/UCSBCourse.javaand/cs/faculty/pconrad/public_html/cs56/12W/labs/lab00/UCSBCourseTester.javato your current directory (.) - cd into the target directory, and use the unix command
wgeturl
For example:
wget http://www.cs.ucsb.edu/~pconrad/cs56/12W/labs/lab00/UCSBCourse.java
wget http://www.cs.ucsb.edu/~pconrad/cs56/12W/labs/lab00/UCSBCourseTester.java
Step 5: Working with the UCSBCourse and UCSBCourseTester files
First, we are going to compile these programs in their initial unmodified versions. The easiest way to do this is with the command:
javac *.java
This command runs the Java compiler. It indicates that we want to compile all of the files ending in .java in the current directory. The * symbol is a "wildcard" that matches any filename. If this command works, you'll just get another Unix prompt. To see if it worked, use the ls command. You should see files called UCSBCourse.class and UCSBCourseTester.class in the listing, along with UCSBCourse.java and UCSBCourseTester.java.
If it didn't work, you'll get an error message. The most likely error message is something like what you see below. This message indicates that you don't have any files in your current directory that have names ending in .java. In this case, you are probably not in the right directory. Try the pwd and ls commands to see where you are, and what you have, and if necessary use the cd command to navigate to where you should be.
-bash-3.2$ javac *.java
javac: file not found: *.java
Usage: javac <options> <source files>
use -help for a list of possible options
-bash-3.2$
Moving on, if you have the UCSBCourse.class and UCSBCourseTester.class in your directory, you are ready to try running the test program. To do that we type:
java UCSBCourseTester
Note that we don't put .java or .class after UCSBCourseTester when using the java command. The java command invokes the Java Virtual Machine (JVM) and says that we want to load the UCSBCourseTester class, look for its main(String [] args) method, and start running the code in that method.
If it works, you should see something like this:
-bash-4.2$ java UCSBCourseTester
Test 1 passed
 Test 2 FAILED
 Test 3 FAILED
Test 4 passed
-bash-4.2$
Note, just an exercise, what happens if you type java UCSBCourse at the command line.
You'll get an error message. Questions to consider:
- Can you explain the error message that you get?
- Does this mean there is anything wrong with the BankAccount.java code, or is this something normal and expected?
Now we are ready to make some modifications. As a first step, change the Javadoc comments in each file to reflect the fact that you are making changes.
In the UCSBCourse.java file, find this comment and adjust it as needed, putting in your name, and adjusting the version to reflect today's date, quarter, etc.
/** UCSBCourse is a class to represent a UCSB Course.
@author Phill Conrad
@author @@@ INSERT YOUR NAME HERE
@version 01/07/2012 for lab00, cs56
- /
If you work with another programmer, indicate that this way:
@author Leslie Knope, working with Ann Perkins
Use a similar format to change the comments in the UCSBCourseTester.java file. We'll use this format throughout the course, so I won't explain it in this much detail every time—I may just refer back to this lab.
Now, we are ready for the modifications. Find the lines of code marked "stub", and fix them so that the tests pass. This shouldn't be too hard to figure out.
Compile both programs, and run the main method of the test class—you should see that the tests now pass.
Step 6: generate javadoc one more time
Now, generate javadoc one more time, using this command (from your ~/cs56/lab00 directory):
javadoc -author -version -d ~/public_html/cs56/lab00/javadoc *.java
Check this website for your javadoc, substituting in your username as appropriate:
- http://www.cs.ucsb.edu/~username/cs56/lab00/javadoc
Step 7: turn in your code using the turnin command
cd to the ~/cs56 directory (i.e. one level higher than ~/cs56/lab00)
Type the following command to turn in your code:
turnin lab00@cs56 lab00
This will turnin the entire contents of your lab00 directory, including both your .java and your .class files.
You are done!
Grading Rubric
This lab is worth 100 pts, distributed as follows. Partial credit may be awarded for each step at the discretion of the TA/Instructor.
- 10 pts: a MyFirstApp.java program that compiles
- 10 pts: a correct Javadoc style comment in the MyFirstApp.java program
- 20 pts: Having two .java files named UCSBCourse.java and UCSBCourseTester.java in your submission that contain code that can be compiled without error.
- 15 pts: Changing the javadoc comments at the top of all three .java files according to the instructions
- 15 pts: javadoc appears correctly at link indicated in instructions on your personal web page (
http://www.cs.ucsb.edu/~username/cs56/lab00/javadoc) - 10 pts: Modifying the UCSBCourse.java file in a way that the tests pass
- 20 pts: Following instructions and submitting on time (including executing the turnin step on a directory called lab00)
Total: 100 pts towards labHwkQuiz component of final course grade.
Due Date
You should do your best to complete this within the assigned lab time during week 1 of this quarter.
If that is not possible, then you should complete the assignment and execute the turnin command no later than 5pm on Friday" of the following week. This gives you more than one full week to seek help during office hours from both the instructor and the TAs, plus one additional lab period to ask the TAs for additional help.
Submissions turned in after that time are subject to receiving zero credit.

